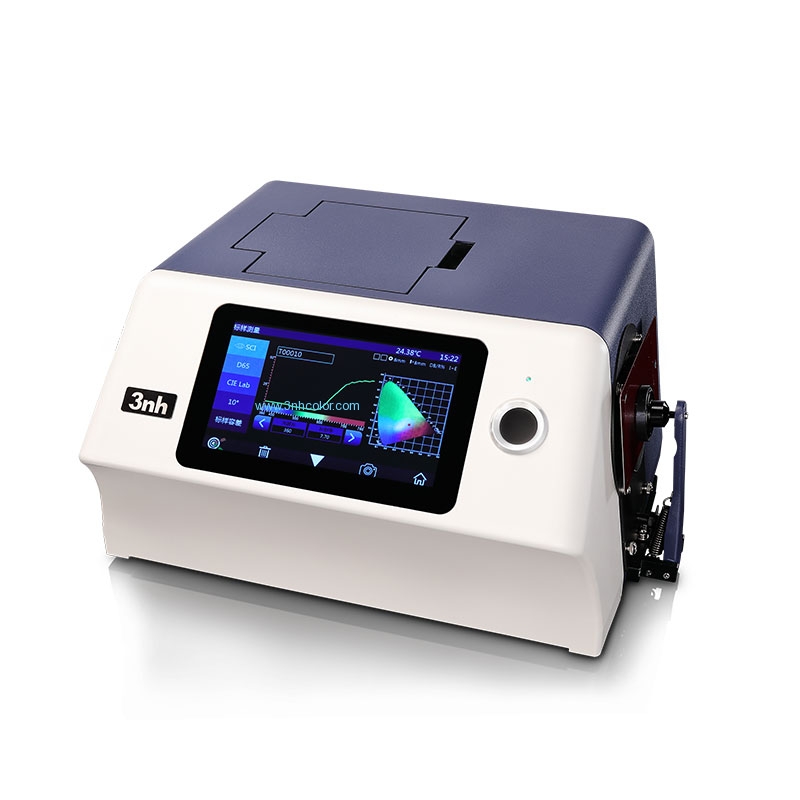
Benchtop Spectrophotometer YS6003
YS6003 desktop spectrophotometer can accurately measure and express various color difference formulas and color indexes in a variety of color spaces. The built-in temperature sensor monitors and compensates the test environment to ensure more accurate measurement results. It is widely used in reflection samples, transparent samples color transfer and quality control in plastic electronics, paint and ink, textile and garment printing, printing and other industries.

Features:
1, High configuration of hardware: 7 inches TFT Color Capacitive Touch-screen Display; Bluetooth 2.1; Concave Grating.
2, Double Array 256 Image Element CMOS Sensor; Long life-span stable xenon lamp.
3, With reflective and transmissive spectrum, accurate Lab value, good to calculate color formula and do precise color transmission.
4, Auto identify measuring aperture. Freely switchable between 3 measuring apertures: Φ 25.4mm/8mm/4mm.
5, Built-in temperature sensor to monitor and compensate the measuring temperature to ensure the measurement more precision.
6, Wavelength range 360nm – 780nm.It can be used to test fluorescent samples with wide applicability and simple operation
7, Independent light source detector to ensure the light source reliable.
8, Multiple measurement modes: Quality Management Mode, Sample Mode; Meet more users’ requirement.
9, Multiple accessories, sample holders, fixation clamp, suitable to more working condition.
10, Big capacity data storage, for 20000 pieces test result.
11, Built-in camera locating.
12, More powerful extended functions at the PC software.
Specifications:
|
Model |
YS6003 |
|
Optical Geometry |
Reflect: di:8°, de:8°(diffused illumination, 8-degree viewing angle) ; SCI (specular component included)/SCE (specular component excluded) ; Include UV / excluded UV light source Transmittance: di:0°, de:0° (diffuse illumination: 0° viewing) ; SCI (specular component included)/SCE (specular component excluded) ; ; Haze(ASTM D1003), Conforms to CIE No.15,GB/T 3978,GB 2893,GB/T 18833, ISO7724/1, ASTM E1164, DIN5033 Teil7 |
|
Application |
It is used for accurate analysis and transmission of laboratory color. Apply in paints, inks, textiles, garments, printing and dyeing, printing etc industries for color transfer and quality control. |
|
Integrating Sphere Size |
Φ154mm |
|
Light Source |
360 nm to 780 nm, Combined LED Light (5 million life span) |
|
Spectrophotometric Mode |
Concave Grating |
|
Sensor |
256 Image Element Double Array CMOS Image Sensor |
|
Wavelength Range |
360-780nm |
|
Wavelength Interval |
10nm |
|
Semiband Width |
10nm |
|
Measured Reflectance Range |
0-200% |
|
Measuring Aperture |
Reflective : Φ30mm/Φ25.4mm, Φ10mm/Φ8mm, Φ6mm/Φ4mm; |
|
Transmissive : Φ30mm/Φ25mm; |
|
|
Remark: 1. Automatic identification of switch caliber 2. Customized Configuration caliber and lens position |
|
|
Specular Component |
Reflectance: SCI&SCE / Transmittance: SCI&SCE |
|
Color Space |
CIE LAB,XYZ,Yxy,LCh,CIE LUV,Musell,s-RGB,HunterLab,βxy,DIN Lab99 |
|
Color Difference Formula |
ΔE*ab,ΔE*uv,ΔE*94,ΔE*cmc(2:1),ΔE*cmc(1:1),ΔE*00, DINΔE99,ΔE(Hunter) |
|
Other Colorimetric Index |
WI (ASTM E313, CIE/ISO, AATCC, Hunter), |
|
YI (ASTM D1925, ASTM 313), |
|
|
|
|
|
MI (Metamerism Index), |
|
|
Staining Fastness, Color Fastness, Color Strength, Opacity, |
|
|
8° Glossiness,Gardner Index, Pt-Co Index, 555 Index, Haze(ASTM D1003) |
|
|
Observer Angle |
2°/10° |
|
Illuminant |
D65,A,C,D50,D55,D75,F1,F2,F3,F4,F5,F6,F7,F8,F9,F10,F11,F12 |
|
Displayed Data |
Spectrogram/Values, Samples Chromaticity Values, Color Difference Values/Graph, PASS/FAIL Result, Color Offset |
|
Measuring Time |
About 2.4s (Measure SCI & SCE about 5s) |
|
Repeatability |
Spectral reflectance: Φ25.4mm/SCI, Standard deviation within 0.06% (400 nm to 700 nm: within 0.05%) |
|
Chromaticity value:Φ25.4mm/SCI, Standard deviation within ΔE*ab 0.01 ( When a white calibration plate is measured 30 times at 5 second intervals after white calibration) Spectral Transmittance: Φ25.4mm/SCI, Standard deviation within 0.06% (400 nm to 700 nm: within 0.06%) |
|
|
Chromaticity value:Φ25.4mm/SCI, Standard deviation within ΔE*ab 0.015 ( When a white calibration plate is measured 30 times at 5 second intervals after white calibration) |
|
|
Inter-instrument Error |
Φ25.4mm/SCI, Within ΔE*ab 0.15 (Average for 12 BCRA Series II color tiles) |
|
Dimension |
L*W*H=370x300x200mm |
|
Weight |
Approx. 9.6kg |
|
Power |
AC 24V, 3A Power adapter power supply |
|
Illuminant Life Span |
5 years, more than 3 million times measurements |
|
Display |
7-inch TFT color LCD, Capacitive Touch Screen |
|
Data Port |
USB & Print serial port |
|
Data Storage |
Standard 1000 Pcs, Sample 20000 Pcs |
|
Language |
Simplified Chinese, Traditional Chinese, English, |
|
Operating Environment |
0~40℃, 0~85%RH (no condensing), Altitude < 2000m |
|
Storage Environment |
-20~50℃, 0~85%RH (no condensing) |
|
Standard Accessory |
Power Adapter, User Guide, CD Disk(PC Software), USB cable, Standard Calibration Board, Black Calibration Cavity, Transmission black baffle, Sample holder, 25.4 caliber, 8 caliber, 4 caliber |
|
Optional Accessory |
Micro-printer, Transmissive Test Component, Micro Aperture(4mm) transmission test clamp component, Instrument inversion components |
|
Notes: The specifications are subject to change without notice. YS6003 quality management software can only be used for data management |
|

